AE-Lock
The AE-Lock is used to get the correct amount of exposure. The camera automatically uses a technique called counter weighted metering which means average metering. What this does is it takes the average exposure of the picture and spreads out the light creating a better exposed image. A fill in flash corrects backlit situations and ensures the background is not over exposed.

Umbrella

Reflector

Your Subject

Tripod

Shutter
The shutter lets light into the camera and determines how long that light exposes the film or light sensors. A fast shutter shutter is 1/4000th of a second, this can go down to a B timer which allows the shutter to be open indefinitely. If the shutter is not open for a long time then not much light is let in. Therefore bright conditions or a flash gun are needed to take the shot. Different shutter speeds is either to capture action or to show movement. The shutter can be held open for a long period of time using the B timer. Using a long shutter speed allows you to take photos even in poor lighting situations. If the shutter is set at below 1/25th of a second then the picture becomes blurred. This is known as camera jog, as we cannot hold the camera still. One way around this is to use a tripod. When the shutter is open for a long period of time the photo can be over exposed. a fast shutter speed can be set on a compact camera by using the sports icon. A slow shutter speed can also be set on a compact camera by using the landscape icon.
Panning
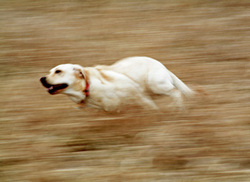
Panning is a clever way of giving the impression of movement. To pan, you first need to choose a lower shutter speed e.g 1/30th of a second or the landscape setting on a compact camera. Then when the subject approaches follow them with your camera. Finally press shutter down and continue following the subject.
Backlit
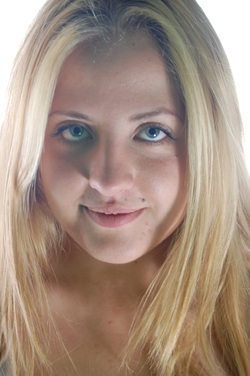
This image is my second favourite as the lighting in this picture creates a pure and angelic atmosphere. I also like the way the background is completely white and looks like it is giving out a white light emphasising and accentuate the models blonde hair, giving it a lighter and softer feel. This effect was created by placing a light behind the model and zooming up on on her. However the flash light was also used but the effect was really done by back lighting.
Below are more images I took using the same techniques.
Below are more images I took using the same techniques.
Flash Light
The pictures below are the pictures I took using the flash gun in the green room. This was one of the four different techniques I experimented in as there is more than one technique to get different lighting effects. The images below are a mixture of both good and bad pictures from the flash light experiment. All the images on this page are unedited and are the original photographs.


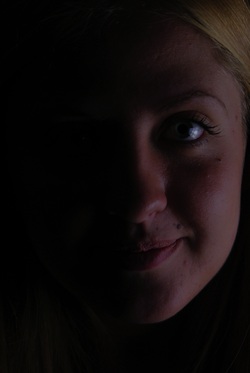
I think this photo is one of the strongest photographs in this experiment as this picture looks like it has been edited. I like the way the shadow falls on the left side of the models facing with the right side dark but still exposed. I think that this photograph being an extreme close-up is what makes this picture a lot more effective as well as the dark lighting and shadow. I achieved this lighting by turning the flash light of and instead using a lamp and placed it on the right side of the models face turning all other lights off so I could create the shadows and darkness.
Below are some more pictures I took using the same technique.
Below are some more pictures I took using the same technique.


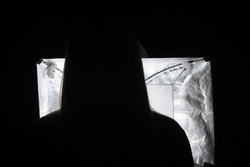
As you can see in the picture the model has been backlit with all other lights in the green room turned off. This created the model to appear as a silhouette.
Below are some more images I took using the same technique.
Below are some more images I took using the same technique.


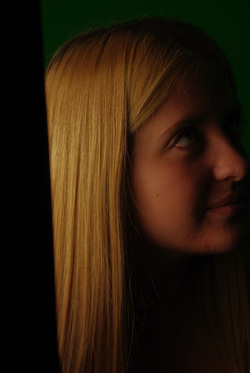
In this image I used two lamps and lit the model on her side. This created a soft shadow to fall on her right side creating a golden light on her hair and leaving the left side exposed to the light. However this is different to the first image as you can still see the models face as the there is only a slight shadow on the face but still leaving the overall image dark.
Below are some more images I took using the same technique.
Below are some more images I took using the same technique.


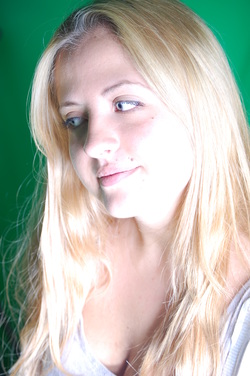
In this picture I used a lot of lighting as you can see there is a lot of light on the model which reflects of her blonde hair. I quite like this picture because the it's a sharp light.


Aperture


The second technique I learnt to control the light intake was to control the light by using the aperture. The aperture controls the amount of light let into the camera. This is measured in F-stops, e.g. f/14 lets in lots of light and f/16 doesn't
Depth of Field
Depth of field is set by the aperture which sets the amount in focus. The focus in any picture can be a narrow/shallow depth of field and a larger and smaller depth of field. The portrait key on a compact camera is the same as using a high f-stop which means a lot of light will be light in.
The landscape dial on a compact camera is the same as using a low f-stop letting in a little light.
